April 24, 2011

"Jewish" Onion Rolls

 Jewish Onion Rolls
These were a lot of fun to make. Seriously messy though. I'll tell you now, this dough is way sticky. I just used plenty of flour while rolling out and it was all good. The recipe I used called for poppy seeds, which I didn't have and I'm fine with because these were delicious anyway. I also ran out of onions for my last half dozen and just sprinkled some garlic powder instead. What I learned is that this dough is pretty versatile and you could make just about any kind of rolls you wanted. 

DOUGH
- 2 packages Active Dry Yeast (or 2 1/2 T)
- 1t Sugar
- 1/2C Warm-Hot Water
- 1/2C solid Vegetable Shortening
- 2t Salt
- 3/4C Sugar
- 1/2 C Margarine or Butter
- 1C Boiling Water
- 3 Large Eggs (Beaten)
- 7 1/2C All-Purpose Flour
- 1C Cold Water

AFTER RISING
- 1 Medium Onion (Diced)
- Kosher Salt (for sprinkling)
- Poppyseeds (for sprinkling)
- 2-3T Margarine or Butter (Melted)


1. Combine yeast, sugar and warm water in a small bowl and let rest for about 5 minutes until it foams. (Trust me, you'll know when)

2. In a large mixing bowl or you can use a stand mixer, blend shortening, margarine, salt, and sugar. Pour in the boiling water and mix until combined and cooled significantly. If you're like me and didn't use boiling water because you thought hot water out of the tap would be good enough, let me welcome you to the "You Were Wrong" Club. I just threw my mixing bowl onto a double broiler until the ingredients came together.

3. In a separate bowl beat the eggs well and combine cold water and fold in the yeast mixture. Alternately add this egg mixture and your flour (I suggest in 1 cup increments) to the now cooled shortening mixture. This will turn into a very sticky dough. Leave the dough in that mixing bowl, cover with plastic wrap (I suggest lightly greased) and leave in your fridge for at least 5 hours. 

4. Once your dough has risen and is out of your fridge. Chop your onions and zap them in the microwave for a couple minutes until they are limp. Drain and cool while you prepare your dough. 

5. Punch down the dough and divide into 6 equal parts. You will want to oil your hands for this. Keep your dough pieces on a floured surface and covered with plastic wrap and a towel. 

6. On another floured surface roll out your dough to a 15" x 7" rectangular like shape. Exact dimensions are not important, but your dough should be pretty thin. 

7. Brush your dough with melted margarine, sprinkle with 1/6th of your onions, about 1/2t of salt and maybe 1/4 t of poppyseeds. Whatever you feel comfortable with. I used lots of salt. :)

8. Lengthwise, roll your dough up until you have a snake-like shape. Cut that snake into roughly 1 1/2" - 2" segments. Place those pieces seam side down on either a baking tray lined with parchment paper, or into greased muffin tins. Cover with greased plastic wrap and let them rise until doubled. I kept mine in the oven with the oven light on. Repeat with the remaining dough. 

9. Once your dough has risen, heat oven to 350 degrees. Brush rolls with 1 egg beaten with 1T of water and then sprinkle with a little salt and poppyseed. Bake for about 15 minutes or until nice and golden on top. 

Be sure to cool completely before freezing. 

My yeast and warm water. It got very foamy.
Margarine+Shortening+Salt+Sugar+Boiling Water

Eggs and cold water with yeast mixture folded in.
7 1/2 cups of flour. I ran out of All Purpose so I used Bread Flour for my last 2 1/2 cups.
Mix the flour and egg-yeast liquids alternately into the shortening mixture. 
Store dough in fridge covered with plastic wrap for 5 hours or overnight. (I stored mine overnight)
Look how pretty is puffed up!
Zap Onions in microwave for a minute or two until they're soft and slightly translucent .
Drain and pat dry. I just spread mine out onto a few layers of paper towel and then returned them to the bowl until they were needed. 
Punch down your dough and divide into 6 equal pieces and store them under a sheet of plastic wrap (on top of a floured surface). I put a towel on top of mine as well.
Take of of your lumps and put it on top of another (heavily) floured surface and sprinkle more flour on top.  
Roll out your dough, sprinkling with flour as needed, until it's roughly 12" by 7" ish. 
Brush the surface area with melted margarine, sprinkle with 1/6th of your onions, kosher salt, and poppy seeds if you have them.
Roll up your dough lengthwise and then cut the roll into sections about 1 1/2" to 2" long. 
Do that to each of your lumps and then place the sections either on a wax papered  baking tray 2" apart, or into greased muffin tins. I did both... For science. (really only because I only had two muffin tins) Truth be told I liked the ones on the trays better.  Cover them with greased plastic wrap and let rest until doubled in size. 
Some of mine puffed really well and some of them didn't. Remove plastic wrap and  brush with your egg-water mixture and sprinkle with more salt (and poppyseeds) and place in a 350 degree oven for 12-15 minutes.
Out of the oven, out of their trays and resting on racks! These were the ones from the muffin tins, I didn't like how the cooked unevenly on the outside and looks like vanilla cupcakes. 
I had to break one open right away. It was so so delicious. Flaky, warm, salty. Everything a roll should be. 

These were some that I baked on the tray. More nature shape, and they had this delightful golden color all over. 
I would (will) definitely make these again. They freeze great as well so don't panic that this recipe makes about 40! I just placed them in freezer ziplock baggies, sucked the air out and threw 'em in the freezer. We ate so many right away that I had to pull a bag out already and they thawed wonderfully!

April 22, 2011

Szechwan Shrimp & Vegetable Stir Fry

I'm loving the time I've been spending in the kitchen lately. If I had one complaint it would be that we don't have a dish washer... And I use a lot of dishes. *sigh* Oh well. Wont stop me from making magic. Tonight I started a Jewish Onion Roll dough which is resting in the fridge and I'll finish up tomorrow and I also made a Szechwan Shrimp Fry with Steamed White Rice for dinner. I have to tell you. This was so so so so good. I will totally be making this again. I kept the heat level pretty low (since I'm such a wimp) but it had small zing still, you could totally turn it up a notch with out much difficulty. 
I made the sauce first and let it sit the fridge for a few hours while I waited for Jay to get home. It's super simple and you could make a larger portion and keep it in a container in your fridge for spontaneous stir fry. 

Combine:
4T Water
2T Ketchup
1 1/2T Soy Sauce (you can add more to taste if you like)
2t Cornstarch
1t Honey
1/2t Crushed Red Pepper
1/4t Ground Ginger

Whisk until the cornstarch is completely incorporated and set aside until you're ready to add to your fry.

You can add any vegetable you like but I did about half a cup of snap peas, half a cup of sliced carrots and celery and about half a cup of thinly sliced halved onions. For me this combination of veggies was perfect. 
 Of course, I there's also got to be garlic! I minced 4 fat cloves.
 I took de-veined frozen shrimp and thawed them under some running water and took off the tails and the shells.
 Once I had everything prepared I heated about 1 tablespoon of vegetable oil in a large non-stick pan (feel free to wok it though) and added my carrot/celery mix first so they could have a little more time to cook. On top of that I added the garlic.
 After a few minutes I added the onion then a minute later I added the snap peas and then a minute later I added the shrimp. I tossed it all around a bit and let the shrimp get coated in the oil and just a tiny bit pink before added the sauce. I kept tossing gently every minute or so until the sauce had thickened and the shrimp were done.
 I spooned some hot white rice into my bowl and added my mix on top of that.
Again, I can not tell you enough how delicious I thought this was. I hoovered it as soon as I could, and I was disappointed there weren't seconds. If I were going to change one thing the next time I make this dish it would be I would make more!

Okay, time to go wash more dishes... See you tomorrow with Onion Rolls and Chocolate Mousse Cake. :)

April 16, 2011

It's my birthday tomorrow!

I made a-freaking-mazing Whole-Wheat Strawberry Breakfast Muffins yesterday. The recipe calls for fresh strawberries but I didn't feel up for the store especially when I had a huge bag of perfectly good frozen in my freezer! Cutting them frozen also cuts down on the mess, it doesn't get juicy and bleed everywhere.
So....
I preheated my oven to 400 degrees, put muffin papers in my tins and started chopping strawberries. I slit them lengthwise once and then lengthwise again and then cut them across either once or twice until I had about 1 cups worth of chopped berries. I would actually recommend doing an extra half or whole cup or more  because once I got about 2/3rds through my batter I ran out of berries. :(

I set my berries aside and started mixing the rest of the ingredients.
In a small/medium bowl (or in a sifter as I did) combine 1 1/2 C whole wheat flour, 1/2 C all purpose flour, 1 T baking powder, 1/8 t salt.

In a large bowl with an electric mixer combine 2 eggs and 6 T butter (or vegetable oil) until smooth then add to that 1 C sugar and 1 t vanilla. Once that is mixed well, add 1 C of light cream or as I did 2% milk. I would suggest the milk be room temp otherwise it might cause the butter to clump a bit.

Once your we ingredients are combined slowly add your dry ingredients until it's well incorporated. Lose the mixer for a spatula and gently fold in your strawberries.

At this point I was a little unhappy with how few berries I had in there so I took half a dozen more frozen berries and put them in a cup of my magic bullet and added 2T of milk and whipped that up until the berries had broken down fairly well and it was a small strawberry smoothy. I folded that mixture in as well. It gave the muffins this great airy quality and a good strawberry flavor all throughout.

Use a ice cream scoop or a 1/4th measuring cup and spoon your mixture into the muffin cups about 2/3 full. This recipe made 24 muffins for me. You can top with sanding sugar at this point and it would be very pretty, but you don't need it.

20 minutes was all these needed and they came out perfectly baked. Just test with a cake tester before you pull it out to make sure. Let the muffins cool in the tin for about 5 minutes, and then pull out to let cool on a rack for about 20-30. If you peel off the paper while it's still to warm, the strawberries will want to drop out of the muffin.

Some great additions to these muffins would be 1 C of chocolate chips, or 1 browning banana mushed up and mixed in.

These were so delicious, you could easy top these with some butter cream and they would taste like cupcakes, but just as is they're great to grab on the go for a snack or morning meal.

April 14, 2011

I wish the weather would make up its mind...

I keep trying to think of ways to use my pastry dough. I made a couple of pot pies with my chicken soup yesterday but I still had a couple hockey pucked sized rounds so I decided I would make an apple tart.
I rolled out my dough so it was nice and thin and centered it in a 1" deep 10" ceramic tart dish. I had plenty of dough left over around the edge to have a nice fold over all around so I just left it. I then took the 2 granny smith apples that we bought yesterday (and I had planned on just eating, but I like this plan better) and used the apple peeler/corer to... well... peel and core the apples. I arranged the apples in a pinwheel pattern around the pan and had enough to stack twice as well as fill the center. I sprinkled about a tablespoon or so of sugar over the apples and then dotted about another tablespoon of salted butter onto the apples. I folded over the rest of the dough and then brushed the exposed dough with some of the heavy cream I had left over from the cake. I slipped it into a preheated 400 degree oven and it's been baking for about 40 minutes now. I'm not sure exactly how long I'll have it go, but I'm thinking maybe an hour. I'm just going to keep an eye on it and make sure it doesn't burn but I want the apples nice and tender. Very excited.

April 12, 2011

Blogging from Illinois

I've been in Rolling Meadows Illinois for nearly two months now. My birthday is in a few days and I am still jobless. I had a couple of promising interviews this week so things are looking up a bit, but until then I've had a lot of time to kill. In the beginning most of it was taken up with unpacking and going through box after box, tedious work I'm telling you. Next time we move I'm committed to burning the house down and just starting new. Other than unpacking, internet surfing, reading, game playing with house work and about a billion trips to the vet sandwiched in between, I've done a lot of cooking and baking. I think I've baked a dozen loafs of bread over last few weeks. The most recent being a sun dried tomato garlic and onion bread. Quite tasty and very savory. Yesterday was a different story. This past weekend my Honey had requested I make a birthday cake to bring on Tuesday for a coworker at his new job. I wanted to impress so I quickly decided against anything from a box and started sorting through some of the recipes I had to see what sounded good. Jay, always a bright one, suggested I take my specialty, Irish Carbomb cupcakes, and turn it into a cake. I was enthralled by the idea! That night after we decided on it I lay awake unable to think with plans for the most delicious cake in the world dancing in my head. We shopped for everything that was needed the next day, then Monday after dropping off one of the dogs for "brain surgery" and coming home from one of my interviews I began.
The plan was this: Double the usual recipe, create a layer cake, the whisky ganache would be in between the layers and then frost! Easy, no? And basically it was. I allowed myself more than plenty of time, and being unemployed I was not rushed or as tired as I have been in the past.
I filled 3, 9" cake pans and baked them for about 50 minutes at 375 degrees as opposed to my usual 20 which works so well for cupcakes. I made sure to spray the pans with a baking spray beforehand because I did not want another carrot birthday cake fiasco on my hands. I let the cakes rest for about 5 minutes before flipping them on to a tart pan bottom tray (also sprayed with Pam) and then flipping them back onto racks to rest for about 15 more minutes. I was pleased and punch to see how beautifully they came out of the cake pans. I used the other half of the tart pan to encircle the cakes as my level for cutting them in half. One of the cakes had less batter, thus it was shorter and thus when I cut it the top half was much smaller and was sacrificed to my tummy. While the cakes had been cooling I had whipped up my ganache, and that was then resting as I cut the cakes. I took my mothers pretty Scandinavian cake tray and lined the bottom with wax paper anticipating a large frosting mess and put my first layer down. I smeared on the ganache with gusto and then carefully put on the next part of my cake and proceeded as such until I had five layers.
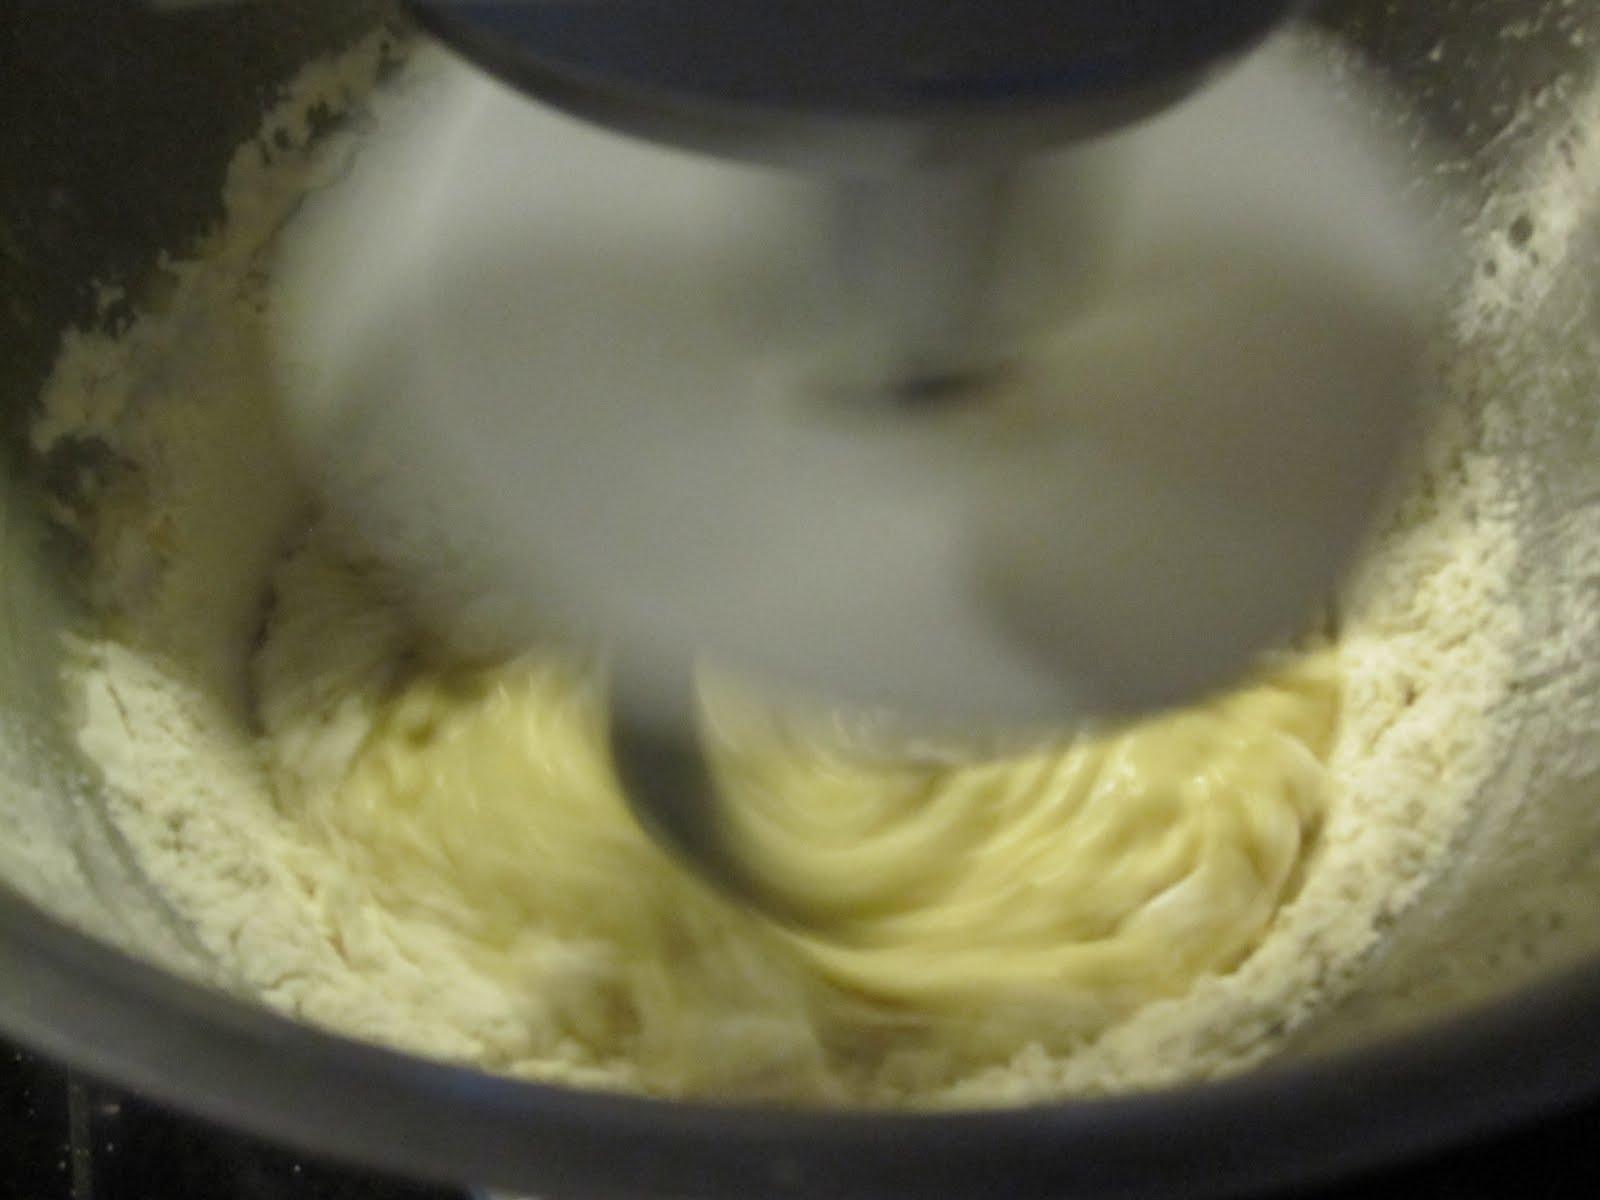
I had so much ganache left and I knew it would solidify fairly well that I decided to cover the rest of the cake in a healthy layer of ganache that would act as a delicious barrier between cake and final frosting. I could have served the cake like this and not only would it have been prettier than my final cake, it would have been delicious in its own right. I let the cake set for awhile while I watched food network and then began on the frosting. I (again) doubled the frosting recipe (I should have tripled it) and it was by far the best that frosting has come out since I started making it. It helped that my butter was truly room temperature, and I whipped it furiously before adding any sugar. I also beat it all at higher speeds than I had in the past, and I added lots more Irish Cream than I usually do it. It. Was. So. Good. I think I must have eaten a pound of it before the day was through. By the time I had made about 6 cups of frosting I thought that my ganache had solidified well so I spooned a large amount of frosting on to the top of the cake planning to work it around from top to bottom creating a nice natural look. I of course misjudged and ended up with a coffee colored frosting as the white and brown mixed. So I shrugged my shoulders and frosted the cake anyways. I let that set again for 10 or 20 minutes and pulled out a ziplock and a pastry tip deciding to try my hand at something  more creative and professional looking.
This is where I make that snorting scoffing sound that indicates things didn't go as planned. I
 kind of did this squiggly through around the very bottom of the cake and didn't like how long that was going to take, so I took a section of the side and did more squiggly things back and forth until I was to the top of the cake. I did that a few more times until half of the side was covered. Then I got bored and wanted to start on the top, so I did small (many more large like than small) drops from the tip in rows line after line until I had half the top covered. I could tell that I was about to run out of frosting, so I did the only sensible thing of going back to squiggly things on the side until a ran out, which was rather quickly. I put my bowl back in the mixer took my last stick of butter and made another batch of frosting. It was still yummy, but the consistency was awful. Not to look at or to feel, but when I started piping that there were these chunks that kept getting stuck in the piping tip and then would push the tip out spurting frosting all over the cake. Then the frosting started to run  down the side of the cake and it was so.... ridiculous. I was done trying so I ended up leaving the top alone and then just took a spatula and smoothed out the sides.
I learned at least one thing that day. That I suck at frosting and need to take a cake decorating class badly. I conceptually understand what I need to do, but the message hasn't reached my hands. *sigh* The cake tastes amazing according to Jay. He said it was a huge hit at work and that people said I should be paid to make one daily and that they kept telling other people to try it. I'm making him bring some home to me so I'm hoping to try it soon. Although I have a mixing bowl in my fridge right now that is a massive glob of leftover cake top, ganache and frosting that I keep sticking a fork into that then somehow makes it way into my mouth.
After the cake was done I wanted to make something for Jay because he had been feeling yucky the last couple days and thought it the perfect chance to try a Chicken Soup recipe. It was very simple. Veggies,  brown rice, quinoa, barley and chicken. I couldn't get any barley in the store so I substituted couscous. I ended up cooking it about 30 minutes longer than the recipe called for. Despite that the rice still had a bit of a bite to it which was fine, and it soaked up all 10 cups of liquid. We have lots of left overs (just add water) and I'm making a pot pie for dinner out of most of the soup and left over tart dough (from weekend quiche). Should be mmm mm good.
This kitchen lends itself well to the culinary arts, I just really wish there were a dishwasher because I am so sick of dishes.

Now!.... for the recipes!


Irish Car Bomb Cake 

Cake 2 c Guinness (or other dark stout)
2 c (4 sticks) unsalted butter
1 1/2 c unsweetened cocoa powder
4 c flour
4 c granulated sugar
1 tbs baking soda
1 1/2 tsp salt
4 large eggs
1 1/3 c sour cream (full fat is best)

Ganache
16 oz bittersweet chocolate
2/3 c heavy cream
2/3 c Bailey's Irish Cream
4 tbs butter, room temperature
3 to 4 tsp Irish whiskey

Frosting

About 8-9 cups confections' sugar
2 stick (1 cup) unsalted butter, at room temperature
8 tablespoons Bailey's Irish Cream (or more, to taste)

1. Pre-heat oven to 350°F. Coat 3, 9" cake pans with either a non-stick baking spray or crisco and a dusting of flour (however you prefer)

2. Bring the stout and butter to simmer in heavy large saucepan over medium heat. Once the butter has melted into the stout add your cocoa powder and whisk until mixture is smooth. Remove from heat.

3. In a separate large bowl, whisk together flour, sugar, baking soda, and salt.

4. In another large bowl, using an electric mixer, beat eggs and sour cream to blend until smooth. Add stout-chocolate mixture to egg mixture and beat just until combined.

5. Slowly add the dry mixture to the wet mixture and beat on slow speed until about 3/4 of your dry mixture is gone. Using a rubber spatula, fold in the remaining dry into the batter until completely combined.

6. Divide batter evenly among cake tins, filling them 2/3 to 3/4 of the way, it will rise a small amount. Bake cake until tester inserted into center comes out clean, rotating them once front to back if your oven bakes unevenly. This should take about 40-50 minutes. I just kept on checking mine every 5 or so minutes after they stopped jiggling to make sure they were done. Remove pans and cool for about 5-10 minutes then remove cakes from pans and cook for another 10-20. Your cakes should not to be hot to handle when you're slicing and moving them around.

7. While your cakes cool, go ahead and make the filling. Chop the chocolate into coarse but roughly even pieces, and transfer it to a heatproof bowl. Heat the cream until it is simmering and pour it over the chocolate. Let it sit for about a minute and then stir until smooth. If it has not melted completely put it in the microwave for 10-15 seconds, or put over a double broiler to finish. Then add the butter, Irish Cream, and whiskey and stir until combined. This will taste very good, try to leave some for the cake. :)

8. Once your cakes are cool and ganache is done slice your cakes in half until you have 6 even pieces. It's okay if the tops of your cakes are slightly rounded. Lay a bottom half on your cake platter or tray and smear on plenty of the ganache to cover. Lay another half on top and again smear with the filling. keep alternating until you have a gorgeous cake tower. 

9. If you have more filling left over you can completely cover the cake in it like I did. Otherwise, no biggie. Let that sit while you.... 

10. Make the frosting! In an electric mixer, mix the butter on medium -high speed until it is very fluffy. You want to get it very light. Slowly add the confectioners' sugar, starting with a few tablespoons at a time of your sugar until the frosting looks thick enough to spread. At this point, add in the Irish Cream and whip it until it is incorporated. Beat in as much or as little of the remaining confectioners' sugar until the frosting has reached your desired consistency and taste. 

11. Frost your cake! I can't give you any advise here. Slap it on however you see fit, either way, it's going to be so so so so good. 

Healthy Chicken Soup


·         1 ½ C - Uncooked Brown Rice
·         ½ C - Uncooked Barley (or cous cous)
·         ½ C - Uncooked quinoa
·         8-10 C - Chicken Stock
·         3-4 C - Cooked Cubed Chicken
·         1 Tbs - Butter
·         1 Large Onion
·         5-7 - Cloves of Garlic - Minced
·         2 C - Chopped Carrots
·         2 C - Celery
·         Seasoning to Taste - Pepper, Rosemary, Thyme


1. In a large soup pot over medium-high heat, sauté onions, carrots and celery until lightly browned, add garlic and sauté for another minute.

2. Add your chicken stock and rice/barley (cous cous)/quinoa and bring to a low boil.

3. Once a boil is reached, turn the heat down to low and simmer for about 30-45 minutes or until the rice is cooked. (I simmered mine for about an hour and 15 - 30 minutes)

4, Add your cooked chicken and any other seasoning at this point and simmer for another 10-15 minutes.

Taste and adjust broth and seasoning levels until it’s perfect. 


Neither of these recipes are mine, but I'm not sure where I found them. I've changed them slightly to fit my tastes though. :)